

brent
-
Posts
126 -
Joined
-
Last visited
-
Days Won
1
Content Type
Profiles
Forums
Downloads
Articles
Posts posted by brent
-
-
Step 1 - Add Plex Repository
The first step we need to do for this guide is to add the Plex repository to our CentOS 7 system.
Go to the 'yum.repos.d' directory and create new repo file 'plex.repo' using the vim editor.
cd /etc/yum.repos.d/
vim plex.repoPaste the following Plex repository configuration there.
# Plex.repo file will allow dynamic install/update of plexmediaserver.
[PlexRepo]
name=PlexRepo
baseurl=https://downloads.plex.tv/repo/rpm/$basearch/
enabled=1
gpgkey=https://downloads.plex.tv/plex-keys/PlexSign.key
gpgcheck=1
Save and exit.
Plex repository has been added to the CentOS 7 system.
Step 2 - Install Plex Media Server on CentOS 7\8
Now we will install Plex media server on our CentOS server.
Run the yum command below.
sudo yum -y install plexmediaserver
After the installation is complete, start the plex service and enable it to launch everytime at system boot using the systemctl commands below.
systemctl start plexmediaserver
systemctl enable plexmediaserverPlex media server has been installed - check it using the following command.
systemctl status plexmediaserver
And you will get the result as shown below.

The Plex Media Server is now running on the CentOS 7 server.
Step 2 - remove Plex Media Server on CentOS 7\8
To completely remove the Plex Media Server from the computer, first make sure the Plex Media Server is not running. Then do the following:
-
Run the command
rpm -e plexmediaserver -
Remove the directory
/var/lib/plexmediaserver/ -
Run the command
userdel plex
Step 3 - Configure Firewalld Rules for Plex Media Server
In this tutorial, we will enable Firewalld services. Make sure firewalld packages are installed on the system.
Or you can install them using the yum command below.
sudo yum -y install firewalld
Now start the firewalld service and enable it to launch every time at system boot.
systemctl start firewalld
systemctl enable firewalldNext, we need to add new firewalld configuration for our plex installation. Plex media server needs some port in the 'LISTEN' state, so we will create new firewalld XML configuration.
Go to the '/etc/firewalld/service' directory and create a new service firewalld configuration 'plex.xml' using vim.
cd /etc/firewalld/services/
vim plexmediaserver.xmlThere, paste the following configuration.
<?xml version="1.0" encoding="utf-8"?>
<service>
  <short>plexmediaserver</short>
  <description>Ports required by plexmediaserver.</description>
  <port protocol="tcp" port="32400"></port>
  <port protocol="udp" port="1900"></port>
  <port protocol="tcp" port="3005"></port>
  <port protocol="udp" port="5353"></port>
  <port protocol="tcp" port="8324"></port>
  <port protocol="udp" port="32410"></port>
  <port protocol="udp" port="32412"></port>
  <port protocol="udp" port="32413"></port>
  <port protocol="udp" port="32414"></port>
  <port protocol="tcp" port="32469"></port>
</service>
Save and exit.
Now add the 'plexmediaserver' service to the firewalld services list, then reload the configuration.
sudo firewall-cmd --add-service=plexmediaserver --permanent
sudo firewall-cmd --reloadAnd you will get the result as below.

The plexmediaserver service has been added to firewalld - check it using the firewalld command below.
firewall-cmd --list-all
And you should get 'plexmediaserver' on service list.

Step 4 - Configure Plex Media Server
Before configuring the Plex media server, make sure you have an account for Plex. If not, you can register using the URL below.
And then login to your account.
If you're a registered user and logged in with your browser, you can open your Plex media server installation url in the following way changing the IP to your server IP.
http://192.168.33.10:32400/web/
And you will be redirected to the plex login as below.

Click the 'SIGN IN' button.
-
Run the command
-
Install Samba4 in CentOS 7
1. First install Samba4 and required packages from the default CentOS repositories using the yum package manager tool as shown.
# yum install samba samba-client samba-common
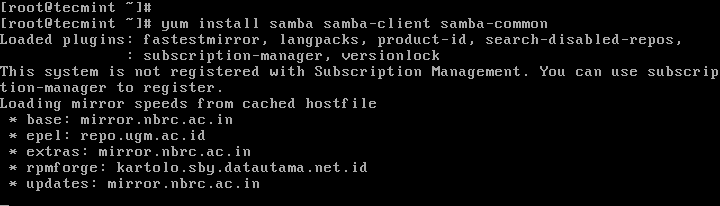
Install Samba4 on CentOS 7
2. After installing the samba packages, enable samba services to be allowed through system firewall with these commands.
# firewall-cmd --permanent --zone=public --add-service=samba
# firewall-cmd --reload

Open Samba on Firewalld
Check Windows Machine Workgroup Settings
3. Before you proceed to configure samba, make sure the Windows machine is in the same workgroup to be configured on the CentOS server.
There are two possible ways to view the Windows machine workgroup settings:
- Right clicking on “This PC” or “My Computer” → Properties → Advanced system settings → Computer Name.
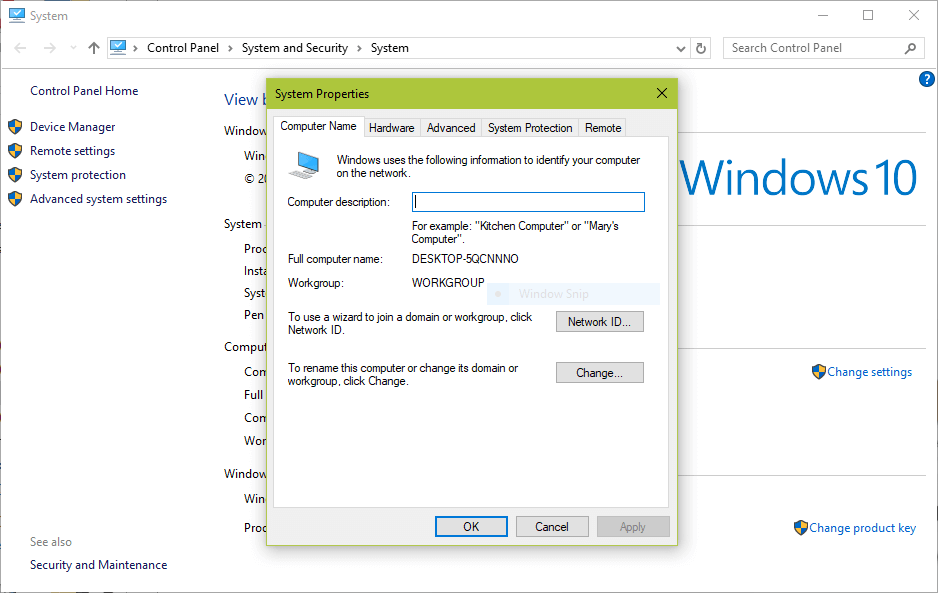
Check Windows WorkGroup
- Alternatively, open the cmd prompt and run the following command, then look for “workstation domain” in the output as shown below.
>net config workstation
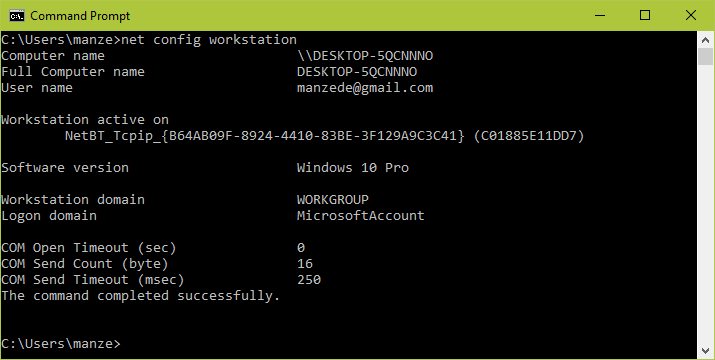
Verify Windows WorkGroup
Configuring Samba4 on CentOS 7
4. The main samba configuration file is /etc/samba/smb.conf, the original file comes with pre-configuration settings which explain various configuration directives to guide you.
But, before configuring samba, I suggest you to take a backup of the default file like this.
# cp /etc/samba/smb.conf /etc/samba/smb.conf.orig
Then, proceed to configure samba for anonymous and secure file sharing services as explained below.
Samba4 Anonymous File Sharing
5. First create the shared directory where the files will be stored on the server and set the appropriate permissions on the directory.
# mkdir -p /srv/samba/anonymous
# chmod -R 0775 /srv/samba/anonymous
# chown -R nobody:nobody /srv/samba/anonymous
Also, you need to change the SELinux security context for the samba shared directory as follows.
# chcon -t samba_share_t /srv/samba/anonymous

Create Samba Shared Directory
6. Next, open the samba configuration file for editing, where you can modify/add the sections below with the corresponding directives.
# vi /etc/samba/smb.conf
Samba Configuration Settings[global] workgroup = WORKGROUP netbios name = centos security = user [Anonymous] comment = Anonymous File Server Share path = /srv/samba/anonymous browsable =yes writable = yes guest ok = yes read only = no force user = nobody
7. Now verify current samba settings by running the command below.
# testparm
Verify Samba Current Configuration SettingsLoad smb config files from /etc/samba/smb.conf rlimit_max: increasing rlimit_max (1024) to minimum Windows limit (16384) Processing section "[homes]" Processing section "[printers]" Processing section "[print$]" Processing section "[Anonymous]" Loaded services file OK. Server role: ROLE_STANDALONE Press enter to see a dump of your service definitions # Global parameters [global] netbios name = centos printcap name = cups security = USER idmap config * : backend = tdb cups options = raw [homes] comment = Home Directories browseable = No inherit acls = Yes read only = No valid users = %S %D%w%S [printers] comment = All Printers path = /var/tmp browseable = No printable = Yes create mask = 0600 [print$] comment = Printer Drivers path = /var/lib/samba/drivers create mask = 0664 directory mask = 0775 write list = root [Anonymous] comment = Anonymous File Server Share path = /srv/samba/anonymous force user = nobody guest ok = Yes read only = No
8. Finally, start and enable samba services to start automatically at next boot and also apply the above changes to take effect.
# systemctl enable smb.service
# systemctl enable nmb.service
# systemctl start smb.service
# systemctl start nmb.service
Testing Anonymous Samba File Sharing
9. Now on the Windows machine, open “Network” from a Windows Explorer window, then click on the CentOShost, or else try to access the server using its IP address (use ifconfig command to get IP address).
e.g. \\192.168.43.168.
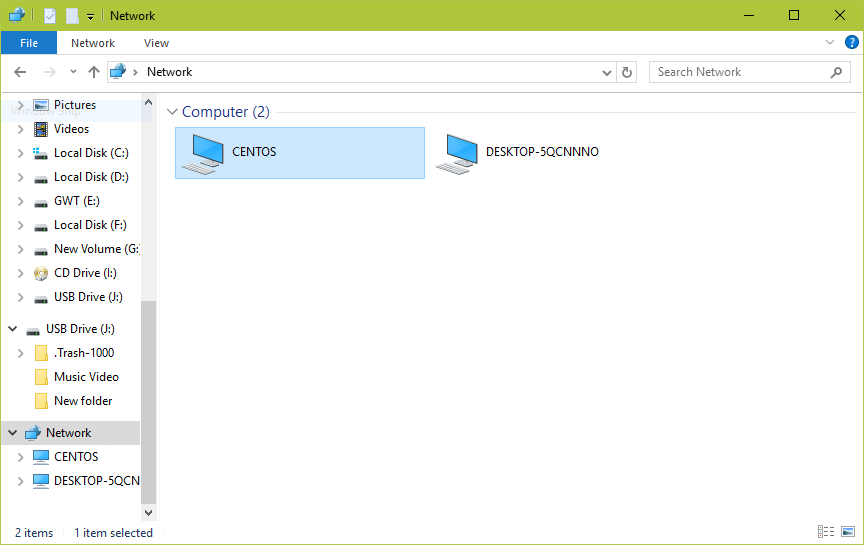
Shared Network Hosts
10. Next, open the Anonymous directory and try to add files in there to share with other users.
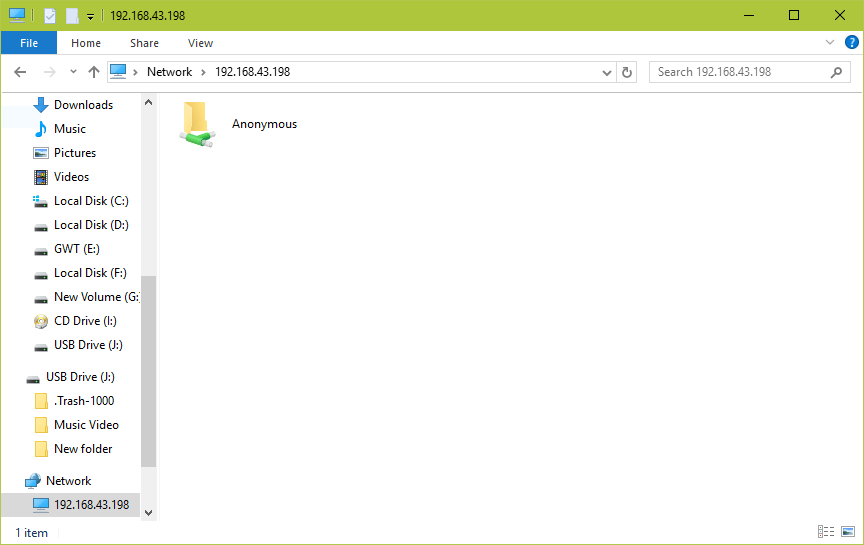
Samba Anonymous Share
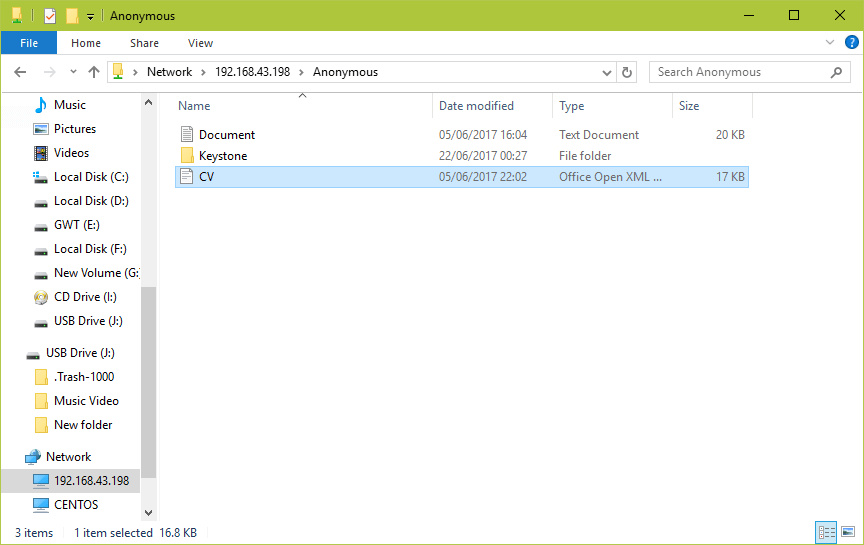
Add Files to Samba Anonymous Share
Setup Samba4 Secure File Sharing
11. First start by creating a samba system group, then add users to the group and set a password for each user like so.
# groupadd smbgrp
# usermod tecmint -aG smbgrp
# smbpasswd -a tecmint
12. Then create a secure directory where the shared files will be kept and set the appropriate permissions on the directory with SELinux security context for the samba.
# mkdir -p /srv/samba/secure
# chmod -R 0770 /srv/samba/secure
# chown -R root:smbgrp /srv/samba/secure
# chcon -t samba_share_t /srv/samba/secure
13. Next open the configuration file for editing and modify/add the section below with the corresponding directives.
# vi /etc/samba/smb.conf
Samba Secure Configuration Settings[Secure] comment = Secure File Server Share path = /srv/samba/secure valid users = @smbgrp guest ok = no writable = yes browsable = yes
14. Again, verify the samba configuration settings by running the following command.
$ testparm
Verify Secure Configuration SettingsLoad smb config files from /etc/samba/smb.conf rlimit_max: increasing rlimit_max (1024) to minimum Windows limit (16384) Processing section "[homes]" Processing section "[printers]" Processing section "[print$]" Processing section "[Anonymous]" Loaded services file OK. Server role: ROLE_STANDALONE Press enter to see a dump of your service definitions # Global parameters [global] netbios name = centos printcap name = cups security = USER idmap config * : backend = tdb cups options = raw [homes] comment = Home Directories browseable = No inherit acls = Yes read only = No valid users = %S %D%w%S [printers] comment = All Printers path = /var/tmp browseable = No printable = Yes create mask = 0600 [print$] comment = Printer Drivers path = /var/lib/samba/drivers create mask = 0664 directory mask = 0775 write list = root [Anonymous] comment = Anonymous File Server Share path = /srv/samba/anonymous force user = nobody guest ok = Yes read only = No [Secure] comment = Secure File Server Share path = /srv/samba/secure read only = No valid users = @smbgrp
15. Restart Samba services to apply the changes.
# systemctl restart smb.service
# systemctl restart nmb.service
Testing Secure Samba File Sharing
16. Go to Windows machine, open “Network” from a Windows Explorer window, then click on the CentOS host, or else try to access the server using its IP address.
e.g. \\192.168.43.168.
You’ll be asked to provide your username and password to login the CentOS server. Once you have entered the credentials, click OK.
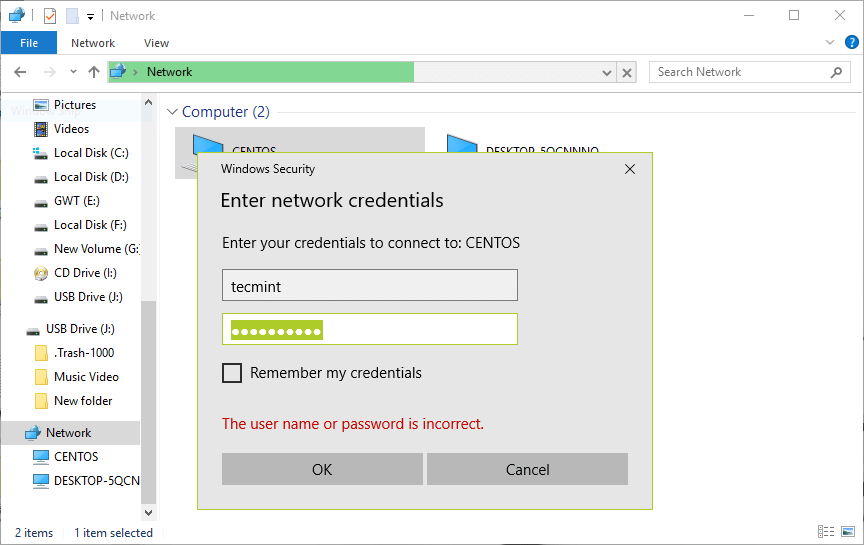
Samba Secure Login
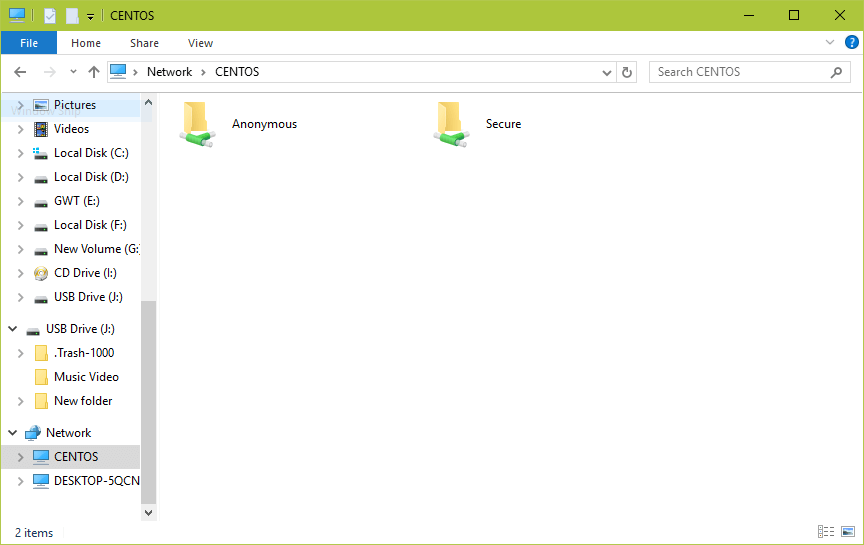
17. Once you successfully login, you will see all the samba shared directories. Now securely share some files with other permitted users on the network by dropping them in Secure directory.
-
navigate to the following location.
/etc/sysconfig/network-scripts/in this location you will find your NIC file. modify the file with your editor of choice.
BOOTPROTO=dhcp
To:
BOOTPROTO=static
Now you'll need to add the entries to set not only the IP address, but the netmask, gateway, and DNS addresses. At the bottom of that file, add the following:
IPADDR=192.168.1.200
NETMASK=255.255.255.0
GATEWAY=192.168.1.1
DNS1=1.0.0.1
DNS2=1.1.1.1
DNS3=8.8.4.4
Save the file
restart networking
sudo systemctl restart network -
Run the following:
curl -s https://raw.githubusercontent.com/sivel/speedtest-cli/master/speedtest.py | python -
-
Plex is a free feature-rich media library platform that provides a way to store all your movies, shows, and other media in one place. You can access Plex from any device, whether you’re at home or on-the-go. There are many different media tools available in the world like, Kodi, Xmbc, OSMC and Mediatomb, but the Plex Media Server is perhaps one of the most popular solutions for managing media. Plex runs on Windows, macOS, Linux, FreeBSD and many more. Plex is a client-server media player system made up from two main components, 1) The Plex Media Server, which organizes music, photos and videos content from personal media libraries and streams it to their player, 2) The Players that can be the Plex web UI, Plex Apps or Plex home theater. Plex Media Server supports Chromecast, Amazon FireTV, Android, iOS, Xbox, PlayStation, Apple TV, Roku, Android TV and various types of smart TVs. If you are looking for a way to watch your movies from anywhere, then Plex is best choice for you.
In this tutorial, we will learn how to install and configure Plex Media Server on Ubuntu 16.04.
Requirements
- A server running Ubuntu 22.04
- A not-root user with sudo privileges setup on your server.
- A static IP address setup on your server.
Getting Started
Before starting, make sure your system is fully up to date by running the following command:
sudo apt-get update -y
sudo apt-get upgrade -yOnce your system is updated, restart your system to apply all these changes with the following command:
sudo reboot
After restarting, log in with sudo user and proceed to the next step.
1. Install Plex Media Server
First, you will need to download the latest version of the Plex from their official website. You can download it by running the following command:
wget https://downloads.plex.tv/plex-media-server/1.7.5.4035-313f93718/plexmediaserver_1.7.5.4035-313f93718_amd64.deb
Once Plex is downloaded, run the following command to install Plex:
sudo dpkg -i plexmediaserver_1.7.5.4035-313f93718_amd64.debNext, start Plex Media Server and enable it to start on boot time by running the following command:
sudo systemctl start plexmediaserver
sudo systemctl enable plexmediaserver
You can check the status of Plex Media Server at any time by running the following command:
sudo systemctl status plexmediaserverYou should see the following output:
? plexmediaserver.service - Plex Media Server for Linux
Loaded: loaded (/lib/systemd/system/plexmediaserver.service; enabled; vendor preset: enabled)
Active: active (running) since Sat 2017-08-05 11:48:52 IST; 17s ago
Main PID: 3243 (sh)
CGroup: /system.slice/plexmediaserver.service
??3243 /bin/sh -c LD_LIBRARY_PATH=/usr/lib/plexmediaserver "/usr/lib/plexmediaserver/Plex Media Server"
??3244 /usr/lib/plexmediaserver/Plex Media Server
??3288 Plex Plug-in [com.plexapp.system] /usr/lib/plexmediaserver/Resources/Plug-ins-313f93718/Framework.bundle/Contents/Resources/Versions/

Aug 05 11:49:04 Node1 systemd[1]: Started Plex Media Server for Linux.
Aug 05 11:49:04 Node1 sh[3243]: Error in command line:the argument for option '--serverUuid' should follow immediately after the equal sign
Aug 05 11:49:04 Node1 sh[3243]: Crash Uploader options (all are required):
Aug 05 11:49:04 Node1 sh[3243]: --directory arg Directory to scan for crash reports
Aug 05 11:49:04 Node1 sh[3243]: --serverUuid arg UUID of the server that crashed
Aug 05 11:49:04 Node1 sh[3243]: --userId arg User that owns this product
Aug 05 11:49:04 Node1 sh[3243]: --platform arg Platform string
Aug 05 11:49:04 Node1 sh[3243]: --url arg URL to upload to
Aug 05 11:49:04 Node1 sh[3243]: --help show help message
Aug 05 11:49:04 Node1 sh[3243]: --version arg Version of the product
Next, you will need to create a directory to store your Plex media. You can create this by running the following command:
sudo mkdir -p /root/plex/movie
Or if you already have shares on your server, skip this step
Once you are finished, you can proceed to the next step.
2. Configure Plex
Now, all the components are installed on your system, it's time to configure and access Plex.
Open your web browser and type the URL http://your-ip:32400/web, login and follow the setup wizard.
Congratulations! your Plex Media Server is ready, you are now ready to connect to it from your Plex client application or Web browser.
-
To disable ipv6, you have to open /etc/sysctl.conf using any text editor and insert the following lines at the end:
net.ipv6.conf.all.disable_ipv6 = 1
net.ipv6.conf.default.disable_ipv6 = 1
net.ipv6.conf.lo.disable_ipv6 = 1
If ipv6 is still not disabled, then the problem is that sysctl.conf is still not activated.
To solve this, open a terminal(Ctrl+Alt+T) and type the command,
sudo sysctl -pYou will see this in the terminal:
net.ipv6.conf.all.disable_ipv6 = 1
net.ipv6.conf.default.disable_ipv6 = 1
net.ipv6.conf.lo.disable_ipv6 = 1
After that, if you run:
cat /proc/sys/net/ipv6/conf/all/disable_ipv6It will report:
1
If you see 1, ipv6 has been successfully disabled.
-
Command Line Partitioning
You'll be using "fdisk" to accomplish this. Refer back to the logical name you noted from earlier. For illustration, I'll use /dev/sdb, and assume that you want a single partition on the disk, occupying all the free space.
If the number of cylinders in the disk is larger than 1024 (and large hard drives always have more), it could, in certain setups, cause problems with:
- software that runs at boot time (e.g., old versions of LILO)
- booting and partitioning software from other OSs (e.g., DOS FDISK, OS/2 FDISK)
Otherwise, this will not negatively affect you.
1) Initiate fdisk with the following command:
sudo fdisk /dev/sdb2) Fdisk will display the following menu:
Command (m for help): m <enter>
Command action
a toggle a bootable flag
b edit bsd disklabel
c toggle the dos compatibility flag
d delete a partition
l list known partition types
m print this menu
n add a new partition
o create a new empty DOS partition table
p print the partition table
q quit without saving changes
s create a new empty Sun disklabel
t change a partition's system id
u change display/entry units
v verify the partition table
w write table to disk and exit
x extra functionality (experts only)
- Command (m for help):
3) We want to add a new partition. Type "n" and press enter.
Command action
e extended
p primary partition (1-4)4) We want a primary partition. Enter "p" and enter.
Partition number (1-4):
5) Since this will be the only partition on the drive, number 1. Enter "1" and enter.
Command (m for help):
If it asks about the first cylinder, just type "1" and enter. (We are making 1 partition to use the whole disk, so it should start at the beginning.)
6) Now that the partition is entered, choose option "w" to write the partition table to the disk. Type "w" and enter.
The partition table has been altered!
7) If all went well, you now have a properly partitioned hard drive that's ready to be formatted. Since this is the first partition, Linux will recognize it as /dev/sdb1, while the disk that the partition is on is still /dev/sdb.
Command Line Formatting
To format the new partition as ext3 file system (best for use under Ubuntu):
sudo mkfs -t ext3 /dev/sdb1To format the new partition as fat32 file system (best for use under Ubuntu & Windows):
sudo mkfs -t fat32 /dev/sdb1As always, substitute "/dev/sdb1" with your own partition's path.
Modify Reserved Space (Optional)
When formatting the drive as ext2/ext3, 5% of the drive's total space is reserved for the super-user (root) so that the operating system can still write to the disk even if it is full. However, for disks that only contain data, this is not necessary.
NOTE: You may run this command on a fat32 file system, but it will do nothing; therefore, I highly recommend not running it.
You can adjust the percentage of reserved space with the "tune2fs" command, like this:
sudo tune2fs -m 1 /dev/sdb1
This example reserves 1% of space - change this number if you wish.
") Using this command does not change any existing data on the drive. You can use it on a drive which already contains data.
Using this command does not change any existing data on the drive. You can use it on a drive which already contains data.
Create A Mount Point
Now that the drive is partitioned and formatted, you need to choose a mount point. This will be the location from which you will access the drive in the future. I would recommend using a mount point with "/media", as it is the default used by Ubuntu. For this example, we'll use the path "/media/mynewdrive"
sudo mkdir /media/mynewdriveNow we are ready to mount the drive to the mount point.
Mount The Drive
You can choose to have the drive mounted automatically each time you boot the computer, or manually only when you need to use it.
Automatic Mount At Boot
Note: Ubuntu now recommends to use UUID instead, see the instructions here:https://help.ubuntu....unity/UsingUUID
You'll need to edit /etc/fstab:
gksu gedit /etc/fstabor in terminal:
sudo nano -Bw /etc/fstabNote: https://help.ubuntu....b#Editing_fstab
Add this line to the end (for ext3 file system):
/dev/sdb1 /media/mynewdrive ext3 defaults 0 2Add this line to the end (for fat32 file system):
/dev/sdb1 /media/mynewdrive vfat defaults 0 2The defaults part may allow you to read, but not write. To write other partition and FAT specific options must be used. If gnome nautilus is being used, use the right-click, mount method, from computer folder. Then launch the mount command from terminal, no options. The last entry should be the FAT drive and and look something like: /dev/sda5 on /media/mynewdrive type vfat (rw,nosuid,nodev,uhelper=hal,shortname=mixed,uid=1000,utf8,umask=077,flush)All of the parts between the parenthesis are the mount options and should replace "defaults" in the fstab file. The "2" at the end instructs your system to run a quick file system check on the hard drive at every boot. Changing it to "0" will skip this. Run 'man fstab' for more info here.
You can now run "sudo mount -a" (or reboot the computer) to have the changes take effect.
If you want to allow a normal user to create files on this drive, you can either give this user ownership of the top directory of the drive filesystem: (replace USERNAME with the username)
sudo chown -R USERNAME:USERNAME /media/mynewdriveor in a more flexible way, practical if you have several users, allow for instance the users in the plugdev group (usually those who are meant to be able to mount removable disks, desktop users) to create files and sub-directories on the disk:
sudo chgrp plugdev /media/mynewdrive
sudo chmod g+w /media/mynewdrive
sudo chmod +t /media/mynewdrive
The last "chmod +t" adds the sticky bit, so that people can only delete their own files and sub-directories in a directory, even if they have write permissions to it (see man chmod).
Manually Mount
Alternatively, you may want to manually mount the drive every time you need it.
For manual mounting, use the following command:
sudo mount /dev/sdb1 /media/mynewdriveWhen you are finished with the drive, you can unmount it using:
sudo umount /media/mynewdrive -
Here is an example of how to use rysnc to copy data from a server to a remote server over SSH.
rsync -av --progress /home/user/directory/ [email protected]:/home/user/directory/rsync -av --progress /home/shares/data/ brent@10.123.153.129: /home/shares/data
-
Here is the command to clean cache from your server.
sudo echo 3 | sudo tee /proc/sys/vm/drop_caches -
In this tip we will see how to use the terminal to check and change the current speed of your network card under Ubuntu or any Debian-based system. This tip will be useful for those having incorrect network card speed that is running for example at 100Mb/s rather than 1000Mb/s.
To check the current network card speed, we will use the "ethtool" command line utility. To install it under Ubuntu/Debian, run the following command:sudo apt-get install ethtool
Replace "eth0" with your own network interface (eth1, eth2, etc.). Here are the outputs returned for my system (speed is displayed under the "Advertised auto-negotiation (...) line):
~$ sudo ethtool eth0
Settings for eth0:
 Supported ports: [ TP ]
 Supported link modes:   10baseT/Half 10baseT/Full
                         100baseT/Half 100baseT/Full
                         1000baseT/Full
 Supports auto-negotiation: Yes
 Advertised link modes:  10baseT/Half 10baseT/Full
                         100baseT/Half 100baseT/Full
                         1000baseT/Full
 Advertised pause frame use: No
 Advertised auto-negotiation: Yes
 Speed: 100Mb/s
 Duplex: Full
 Port: Twisted Pair
 PHYAD: 0
 Transceiver: internal
 Auto-negotiation: on
 MDI-X: Unknown
 Supports Wake-on: umbg
 Wake-on: d
 Current message level: 0x00000007 (7)
          drv probe link
 Link detected: yes
To change for example the speed of your network card from 100Mb/s to 1000M/s, run this command:
sudo ethtool -s eth0 speed 1000 duplex full autoneg off -
PhpMyAdmin is a great easy to use web admin interface for your mysql databases. The one down side is it can be a security threat. Seems like many bots on the internet just go looking for phpmyadmin installed on web servers. Then run automated attacks.
If you have logwatch installed you may often see many failed attempts
To add an extra layer of security you can prevent any one from accessing phpMyAdmin except by defined IP address. We will be setting this up on an Ubuntu 12.04 Server.
Before we begin we will need to know the IP Address that you will be using to connect to phpmyadmin. If the server you are going to be accessing is hosted or on another network you can use http://whatismyip.com to find your external address.
Login to your server at the console or using SSH to connect to it remotely.
The file we will be editing is /etc/apache2/conf.d/phpmyadmin.conf. In this example I am going to use command line text editor nano to keep things simple. If you preffer to use another text editor like vim or emacs feel free to do so.
sudo nano /etc/apache2/conf.d/phpmyadmin.conf
Add the following code.
Note: Remove the "#" from the from of the thrid line and replace ENTER.YOUR.IP.ADDRESS with the IP address you wish to allow. Also If you are behind a router you may want to use your router IP eg: 192.168.2.1
Order Allow,Deny
Allow from 127.0.0.1
#Allow from 192.168.2.106
Now lets restart apache.
sudo /etc/init.d/apache2 restart
-
Postfix is a Mail Transport Agent (MTA), supporting LDAP, SMTP AUTH (SASL), TLS and running in a chroot environment. Postfix is Wietse Venema's mailer that started life as an alternative to the widely-used Sendmail program. Postfix attempts to be fast, easy to administer, and secure, while at the same time being sendmail compatible enough to not upset existing users. Thus, the outside has a sendmail-ish flavor, but the inside is completely different. This software was formerly known as VMailer. It was released by the end of 1998 as the IBM Secure Mailer. From then on it has lived on as Postfix. This rpm supports LDAP, SMTP AUTH (trough cyrus-sasl) and TLS.
Lets get started.
First of all we need to install postfixsudo apt-get install postfix
sudo /usr/lib/ssl/misc/CA.sh -newca
CA certificate filename (or enter to create)
(press Enter here)
Making CA certificate ...
Generating a 1024 bit RSA private key
..........++++++
.........++++++
writing new private key to './demoCA/private/./cakey.pem'
Enter PEM pass phrase: <type a password here>
Verifying - Enter PEM pass phrase: <retype the password>
-----
You are about to be asked to enter information that will be incorporated
into your certificate request.
What you are about to enter is what is called a Distinguished Name or a DN.
There are quite a few fields but you can leave some blank
For some fields there will be a default value,
If you enter '.', the field will be left blank.
-----
Country Name (2 letter code) [AU]: <enter>
State or Province Name (full name) [Some-State]: <enter>
Locality Name (eg, city) []: <enter>
Organization Name (eg, company) [Internet Widgits Pty Ltd]: <enter>
Organizational Unit Name (eg, section) []: <enter>
Common Name (eg, YOUR name) []: <your name>
Email Address []: <your email>

Please enter the following 'extra' attributes
to be sent with your certificate request
A challenge password []: <enter>
An optional company name []: <enter>
Using configuration from /usr/lib/ssl/openssl.cnf
Enter pass phrase for ./demoCA/private/./cakey.pem: <same password as before>
Check that the request matches the signature
Signature ok
$ openssl genrsa -out NAS.key 1024
Generating RSA private key, 1024 bit long modulus

$ openssl req -new -key NAS.key -out NAS.csr -days 3650
You are about to be asked to enter information that will be incorporated
into your certificate request.
What you are about to enter is what is called a Distinguished Name or a DN.
There are quite a few fields but you can leave some blank
For some fields there will be a default value,
If you enter '.', the field will be left blank.
-----
Country Name (2 letter code) [AU]: <enter>
State or Province Name (full name) [Some-State]: <enter>
Locality Name (eg, city) []: <enter>
Organization Name (eg, company) [Internet Widgits Pty Ltd]: <enter>
Organizational Unit Name (eg, section) []: <type something here, this must be different from above>
Common Name (eg, YOUR name) []: <your name>
Email Address []: <your email>

Please enter the following 'extra' attributes
to be sent with your certificate request
A challenge password []: <enter>
An optional company name []: <enter>

$ openssl ca -days 3650 -crldays 3650 -out NAS.pem -infiles NAS.csr
Using configuration from /usr/lib/ssl/openssl.cnf
Enter pass phrase for ./demoCA/private/cakey.pem: <same password as before>
Check that the request matches the signature
Signature ok

Certificate is to be certified until Oct 18 11:08:58 2021 GMT (365 days)
Sign the certificate? [y/n]: <type y>


1 out of 1 certificate requests certified, commit? [y/n] <type y>
Write out database with 1 new entries
Data Base Updated
sudo mkdir /etc/postfix/certs
sudo cp NAS.key NAS.pem /etc/postfix/certs
sudo cp /etc/ssl/certs/Equifax_Secure_CA.pem /etc/postfix/certs/cacert.pem
sudo nano /etc/postfix/sasl/sasl_passwd
and enter your email account and password. You can create a new gmail account if you are not happy to leave your password in the file. Also in case you sometimes change your own gmail password, you dont have remember to change it here.
The file should look like this:gmail-smtp.l.google.com myaccount@gmail.com:mypassword smtp.gmail.com myaccount@gmail.com:mypassword
Change the permissions of the sasl_passwd file with:
sudo chmod 400 /etc/postfix/sasl/sasl_passwd
We want to make a backup of postfix main.cf file:
sudo cp /etc/postfix/main.cf /etc/postfix/main.cf.orig
sudo nano/etc/postfix/main.cf
This is how the main.cf will look.
# See /usr/share/postfix/main.cf.dist for a commented, more complete version


# Debian specific: Specifying a file name will cause the first
# line of that file to be used as the name. The Debian default
# is /etc/mailname.
#myorigin = /etc/mailname

smtpd_banner = $myhostname ESMTP $mail_name (Ubuntu)
biff = no

# appending .domain is the MUA's job.
append_dot_mydomain = no

# Uncomment the next line to generate "delayed mail" warnings
#delay_warning_time = 4h

readme_directory = no

# auth
smtp_sasl_auth_enable=yes
smtp_sasl_password_maps = hash:/etc/postfix/sasl/sasl_passwd

# TLS client side certificate
smtp_use_tls = yes
smtp_sasl_security_options = noanonymous
smtp_sasl_tls_security_options = noanonymous
smtp_tls_note_starttls_offer = yes
tls_random_source = dev:/dev/urandom
smtp_tls_scert_verifydepth = 5
smtp_tls_CAfile = /etc/postfix/certs/cacert.pem
smtp_tls_key_file=/etc/postfix/certs/NAS.key
smtp_tls_cert_file=/etc/postfix/certs/NAS.pem
smtp_tls_enforce_peername = no

# TLS parameters

smtpd_tls_ask_ccert = yes
smtpd_tls_req_ccert =no

smtpd_tls_cert_file=/etc/ssl/certs/ssl-cert-snakeoil.pem
smtpd_tls_key_file=/etc/ssl/private/ssl-cert-snakeoil.key
smtpd_use_tls=yes
smtpd_tls_session_cache_database = btree:${data_directory}/smtpd_scache
smtp_tls_session_cache_database = btree:${data_directory}/smtp_scache

# See /usr/share/doc/postfix/TLS_README.gz in the postfix-doc package for
# information on enabling SSL in the smtp client.

myhostname = NAS
alias_maps = hash:/etc/aliases
alias_database = hash:/etc/aliases
mydestination = NAS, localhost.localdomain, , localhost
#relayhost =
relayhost = [smtp.gmail.com]:587
mynetworks = 127.0.0.0/8 [::ffff:127.0.0.0]/104 [::1]/128
mailbox_size_limit = 0
recipient_delimiter = +
inet_interfaces = all
sudo postmap /etc/postfix/sasl/sasl_passwd

sudo /etc/init.d/postfix reload
from the box you will send emails from, login with your browser to:
http://www.google.co...ayUnlockCaptcha
and unlock your IP to allow you to send email from postfix
Open two terminals:
In one type tail -f /var/log/mail.log
and in the other do your test to send out an email:
lets send a test email
telnet 127.0.0.1 25
EHLO test
MAIL FROM: <from-email>
RCPT TO: <recipient-email>
DATA
Type message here.
<Enter>.<Enter> (press enter, type a dot, press enter)
QUIT
-
If you are running a headless server and would like to see what the processor you are using then here is the steps.
cat /proc/cpuinfo
and to see the cores
grep -c processor /proc/cpuinfo
-
If you go into /boot and do a ls chances are you are going to have a very long list of images sitting in there. all these images are taking up memory. In order to remove them completely. take in mind it is always good to keep an older kernel after an upgrade in case an issue arises. but if you have the latest kernel and everything is working fine and you want to free up some space then here is the script that you will want to use to remove all of the bloat..
dpkg -l 'linux-*' | sed '/^ii/!d;/'"$(uname -r | sed "s/\(.*\)-\([^0-9]\+\)/\1/")"'/d;s/^[^ ]* [^ ]* \([^ ]*\).*/\1/;/[0-9]/!d' | xargs sudo apt-get -y purge
-
Using sub-domains is a good way to organize your website. example.com is what we will call the parent domain. You could have many different parts to your website. For example you could have forums, books, music, really anything. so instead of having all your components to your website lay in the same directory /var/www you could go a step further and organize it. Here is an example of how you could structure /var/www using sub-domains
/var/www/example.com/html { Main domain }
/var/www/example.com/logs {apache logs for site}
/var/www/music.example.com {subdomain}
/var/www/media.example.com {subdomain}
By using this type of structure to set up sub-domains all your website components eg: forums, music, books wont have to all be in the root directory of the website. Do you like www.example.com/forums? or would you rather see forums.example.com?
Here is how we accomplish this.
We need to navigate to
cd /etc/apache2/sites-available/
Now we are going to create our sub-domain file.
sudo nano forums.example.com
We will use a virtual host here is what it will look like.
<VirtualHost *:80>
ServerName forums.example.com
ServerAlias www.forums.example.com
DocumentRoot /var/www/forums/
</VirtualHost>
<Directory /var/www/forums/>
                Options -Indexes FollowSymLinks MultiViews
                AllowOverride All
                Order allow,deny
                allow from all
</Directory>
If you want your individual site logs to reside in /var/www/subdomain.example.com/logs you need to create the logs/ directory in the root of your sub-domain directory.
Once directory is created you need to modify your host file to look like the below.
<VirtualHost *:80>
ServerName forums.example.com
ServerAlias www.forums.example.com
DocumentRoot /var/www/forums.example.com
</VirtualHost>
LogLevel warn
  ErrorLog /var/www/subdomain.example.com/logs/error-mysubdomainname.com.log
  CustomLog /var/www/subdomain.example.com/logs/access-mysubdomainname.com.log combined

<Directory /var/www/forums/>
                Options -Indexes FollowSymLinks MultiViews
                AllowOverride All
                Order allow,deny
                allow from all
</Directory>
Next we will need to enable the site with apache2.
sudo a2ensite subdomain.example.com
Now we need to reload apache for the changes to take place.
sudo /etc/init.d/apache2 reload
Now all you need to do is create a folder in /var/www called forums eg; /var/www/forums
In order for you to be able to access the forums.example.com you will need to modify DNS and add an A record. You Can go to the registar where you got the domain and register the sub-domain and point it to your server, you could use a third party dns such as zoneedit to handle all your dns needs for your domain
-
vsftpd is a secure ftp daemon
vsftpd - FTP Server Installation
vsftpd is an FTP daemon available in Ubuntu. It is easy to install, set up, and maintain. To install vsftpd you can run the following command:sudo apt-get install vsftpd
We need to set the passive ports
I then insert two lines into /etc/vsftpd/vsftpd.conf as the following:
pasv_min_port=5000
pasv_max_port=5025
If you are using a fire wall make sure that you allow these ports through, I use UFW
sudo ufw allow 5000:5025/tcp
Anonymous FTP Configuration
By default vsftpd is configured to only allow anonymous download. During installation a ftp user is created with a home directory of /home/ftp. This is the default FTP directory.
If you wish to change this location, to /srv/ftp for example, simply create a directory in another location and change the ftp user's home directory:sudo mkdir /srv/ftp sudo usermod -d /srv/ftp ftp
After making the change restart vsftpd:
sudo /etc/init.d/vsftpd restart
Finally, copy any files and directories you would like to make available through anonymous FTP to /srv/ftp.
User Authenticated FTP Configuration
To configure vsftpd to authenticate system users and allow them to upload files edit /etc/vsftpd.conf:
local_enable=YES
write_enable=YES
Now restart vsftpd:
sudo /etc/init.d/vsftpd restart
Now when system users login to FTP they will start in their home directories where they can download, upload, create directories, etc.
Similarly, by default, the anonymous users are not allowed to upload files to FTP server. To change this setting, you should uncomment the following line, and restart vsftpd:
anon_upload_enable=YES
Enabling anonymous FTP upload can be an extreme security risk. It is best to not enable anonymous upload on servers accessed directly from the Internet.
The configuration file consists of many configuration parameters. The information about each parameter is available in the configuration file. Alternatively, you can refer to the man page, man 5 vsftpd.conf for details of each parameter.
Securing FTP
There are options in /etc/vsftpd.conf to help make vsftpd more secure. For example users can be limited to their home directories by uncommenting:chroot_local_user=YES
You can also limit a specific list of users to just their home directories:
chroot_list_enable=YES
chroot_list_file=/etc/vsftpd.chroot_list
After uncommenting the above options, create a /etc/vsftpd.chroot_list containing a list of users one per line. Then restart vsftpd:
sudo /etc/init.d/vsftpd restart
Also, the /etc/ftpusers file is a list of users that are disallowed FTP access. The default list includes root, daemon, nobody, etc. To disable FTP access for additional users simply add them to the list.
FTP can also be encrypted using FTPS. Different from SFTP, FTPS is FTP over Secure Socket Layer (SSL). SFTP is a FTP like session over an encrypted SSH connection. A major difference is that users of SFTP need to have a shell account on the system, instead of a nologin shell. Providing all users with a shell may not be ideal for some environments, such as a shared web host.
To configure FTPS, edit /etc/vsftpd.conf and at the bottom add:ssl_enable=Yes
Also, notice the certificate and key related options:
rsa_cert_file=/etc/ssl/certs/ssl-cert-snakeoil.pem
rsa_private_key_file=/etc/ssl/private/ssl-cert-snakeoil.key
By default these options are set the certificate and key provided by the ssl-cert package. In a production environment these should be replaced with a certificate and key generated for the specific host. For more information on certificates see the section called “Certificates”.
Now restart vsftpd, and non-anonymous users will be forced to use FTPS:sudo /etc/init.d/vsftpd restart
To allow users with a shell of /usr/sbin/nologin access to FTP, but have no shell access, edit /etc/shells adding the nologin shell:
# /etc/shells: valid login shells
/bin/csh
/bin/sh
/usr/bin/es
/usr/bin/ksh
/bin/ksh
/usr/bin/rc
/usr/bin/tcsh
/bin/tcsh
/usr/bin/esh
/bin/dash
/bin/bash
/bin/rbash
/usr/bin/screen
/usr/sbin/nologin
This is necessary because, by default vsftpd uses PAM for authentication, and the /etc/pam.d/vsftpd configuration file contains:
auth required pam_shells.so
The shells PAM module restricts access to shells listed in the /etc/shells file.
Most popular FTP clients can be configured connect using FTPS. The lftp command line FTP client has the ability to use FTPS as well. -
First we have to install the samba server:
(**Ubuntu 12.04**)
sudo apt-get install samba smbfs
(**Ubuntu 14.06**)
sudo apt-get install samba cifs-utilsTo mount a smb share to a ubuntu server run click here
Here is the steps to mount a drive to your ubuntu desktop click here or if you want to mount the drives using CIFS click here
Now you need to configure samba. Lets open up smb.conf.
sudo nano /etc/samba/smb.conf
Here is a copy of my Samba conf file. *****NOTE***** I don't have home directory sharing enabled by default. I manually add them.
#======================= Share Definitions =======================

    # Un-comment the following (and tweak the other settings below to suit)
    # to enable the default home directory shares. This will share each
    # user's home directory as \\server\username
    #[homes]
    #comment = Home Directories
    #browseable = yes

    # By default, \\server\username shares can be connected to by anyone
    # with access to the samba server. Un-comment the following parameter
    # to make sure that only "username" can connect to \\server\username
    valid users = %S

    # By default, the home directories are exported read-only. Change next
    # parameter to 'yes' if you want to be able to write to them.
    writable = yes


[global]
        server string = %h server (Samba, Ubuntu)
        map to guest = Bad User
        obey pam restrictions = Yes
        pam password change = Yes
        passwd program = /usr/bin/passwd %u
        passwd chat = *Enter\snew\s*\spassword:* %n\n *Retype\snew\s*\spassword:* %n\n *password\supdated\ssuccessfully* .
        unix password sync = Yes
        syslog = 0
        log file = /var/log/samba/log.%m
        max log size = 1000
        dns proxy = No
        usershare allow guests = Yes
        panic action = /usr/share/samba/panic-action %d
        valid users = brent, brian, linda
        admin users = brent, linda
        write list = brent, brian, linda

[printers]
        comment = All Printers
        path = /var/spool/samba
        create mask = 0700
        printable = Yes
        browseable = No

[print$]
        comment = Printer Drivers
        path = /var/lib/samba/printers

[www]
        path = /var/www
               valid users = brent
                     write list = brent

[Brent]
        path = /home/brent
               valid users = brent
                     write list = brent

[Linda]
        path = /home/linda
               valid users = brent, linda
                     write list = brent, linda

[movies]
        path = /home/shares/movies
               valid users = brent, linda
                     write list = brent, linda

[Data]
	path = /home/shares/data
	       valid users = brent
	             write list = brent

[subtitles]
	path = /home/shares/subtitles
	       valid users = brent
	             write list = brent

[music]
        path = /home/shares/music
               valid users = brent, linda
                     write list = brent, linda

[pictures]
	path = /home/shares/pictures
	       valid users = brent
	             write list = brent

[scans]
	path = /home/scans
	       valid users = brent, linda
	             write list = brent, linda

[Work]
	path = /home/shares/work
	       valid users = brent
	             write list = brent
Now you should be able to map a drive on windows using the following share format:
\\ubuntumachine\usernameFor example, if the Ubuntu machine is named ubuntuserv, and the username is unixmen, your share path would be \\ubuntuserv\unixmen
Here is a copy of what my samba.conf file looks like
To create the users you will need to run this command
sudo smbpasswd -a your-user-name
If your unix account has been disabled you will want to run the -e command
sudo smbpasswd -e your-user-name
Then restart the samba server with:
sudo restart smbd -
The CentOS 7 official software repositories have PHP 5.4 which has reached the end of life and no longer actively maintained by the developers.
To keep up with the latest features and security updates, you need a newer (probably the latest) version of PHP on your CentOS 7 system.
Installing PHP 7 on CentOS 7
1. To install PHP 7, you have to install and enable EPEL and Remi repository to your CentOS 7 system with the commands below.
# yum install https://dl.fedoraproject.org/pub/epel/epel-release-latest-7.noarch.rpm
# yum install http://rpms.remirepo.net/enterprise/remi-release-7.rpm
2. Next, you need to install yum-utils, a collection of useful programs for managing yum repositories and packages. It has tools that basically extend yum’s default features.
It can be used for managing (enabling or disabling) yum repositories as well as packages without any manual configuration and so much more.
# yum install yum-utils3. One of the programs provided by yum-utils is yum-config-manager, which you can use to enable Remirepository as the default repository for installing different PHP versions as shown.
# yum-config-manager --enable remi-php70 [Install PHP 7.0]If you want to install PHP 7.1 or PHP 7.2 on CentOS 7, just enable it as shown.
# yum-config-manager --enable remi-php71   [Install PHP 7.1]
# yum-config-manager --enable remi-php72   [Install PHP 7.2]
4. Now install PHP 7 with all necessary modules with the command below.
# yum install php php-mcrypt php-cli php-gd php-curl php-mysql php-ldap php-zip php-fileinfoAfterwards, double check the installed version of PHP on your system.
# php -v
You now have php7.0 installed
How To Install OpenVPN Access Server on Centos 7-8|RHEL 7-8
in Server
Posted
Step 1 — Installing OpenVPN
To start, we will install OpenVPN on the server. We'll also install Easy RSA, a public key infrastructure management tool which will help us set up an internal certificate authority (CA) for use with our VPN. We'll also use Easy RSA to generate our SSL key pairs later on to secure the VPN connections.
Log in to the server as the non-root sudo user, and update the package lists to make sure you have all the latest versions.
The Extra Packages for Enterprise Linux (EPEL) repository is an additional repository managed by the Fedora Project containing non-standard but popular packages. OpenVPN isn't available in the default CentOS repositories but it is available in EPEL, so install EPEL:
Then update your package lists once more:
Next, install OpenVPN and
wget, which we will use to install Easy RSA:Using
wget, download Easy RSA. For the purposes of this tutorial, we recommend using easy-rsa-2 because there’s more available documentation for this version. You can find the download link for the latest version of easy-rsa-2 on the project’s Releases page:Next, extract the compressed file with
tar:This will create a new directory on your server called
easy-rsa-old-2.3.3. Make a new subdirectory under/etc/openvpnand name iteasy-rsa:Copy the extracted Easy RSA files over to the new directory:
Then change the directory’s owner to your non-root sudo user:
Once these programs are installed and have been moved to the right locations on your system, the next step is to customize the server-side configuration of OpenVPN.
Step 2 — Configuring OpenVPN
Like many other widely-used open-source tools, there are dozens of configuration options available to you. In this section, we will provide instructions on how to set up a basic OpenVPN server configuration.
OpenVPN has several example configuration files in its documentation directory. First, copy the sample
server.conffile as a starting point for your own configuration file.Open the new file for editing with the text editor of your choice. We’ll use nano in our example, which you can download with the
yum install nanocommand if you don’t have it on your server already:There are a few lines we need to change in this file, most of which just need to be uncommented by removing the semicolon,
;, at the beginning of the line. The functions of these lines, and the other lines not mentioned in this tutorial, are explained in-depth in the comments above each one.To get started, find and uncomment the line containing
push "redirect-gateway def1 bypass-dhcp". Doing this will tell your client to redirect all of its traffic through your OpenVPN server. Be aware that enabling this functionality can cause connectivity issues with other network services, like SSH:/etc/openvpn/server.conf
Because your client will not be able to use the default DNS servers provided by your ISP (as its traffic will be rerouted), you need to tell it which DNS servers it can use to connect to OpenVPN. You can pick different DNS servers, but here we'll use Google's public DNS servers which have the IPs of
8.8.8.8and8.8.4.4.Set this by uncommenting both
push "dhcp-option DNS ..."lines and updating the IP addresses:We want OpenVPN to run with no privileges once it has started, so we need to tell it to run with a user and group of nobody. To enable this, uncomment the
user nobodyandgroup nobodylines:Next, uncomment the
topology subnetline. This, along with theserver 10.8.0.0 255.255.255.0line below it, configures your OpenVPN installation to function as a subnetwork and tells the client machine which IP address it should use. In this case, the server will become10.8.0.1and the first client will become10.8.0.2:It’s also recommended that you add the following line to your server configuration file. This double checks that any incoming client certificates are truly coming from a client, hardening the security parameters we will establish in later steps:
Lastly, OpenVPN strongly recommends that users enable TLS Authentication, a cryptographic protocol that ensures secure communications over a computer network. To do this, you will need to generate a static encryption key (named in our example as
myvpn.tlsauth, although you can choose any name you like). Before creating this key, comment the line in the configuration file containingtls-auth ta.key 0by prepending it with a semicolon. Then, addtls-crypt myvpn.tlsauthto the line below it:Save and exit the OpenVPN server configuration file (in nano, press
CTRL - X,Y, thenENTERto do so), and then generate the static encryption key with the following command:Now that your server is configured, you can move on to setting up the SSL keys and certificates needed to securely connect to your VPN connection.
Step 3 — Generating Keys and Certificates
Easy RSA uses a set of scripts that come installed with the program to generate keys and certificates. In order to avoid re-configuring every time you need to generate a certificate, you can modify Easy RSA’s configuration to define the default values it will use for the certificate fields, including your country, city, and preferred email address.
We’ll begin our process of generating keys and certificates by creating a directory where Easy RSA will store any keys and certs you generate:
The default certificate variables are set in the
varsfile in/etc/openvpn/easy-rsa, so open that file for editing:Scroll to the bottom of the file and change the values that start with
export KEY_to match your information. The ones that matter the most are:KEY_CN: Here, enter the domain or subdomain that resolves to your server.KEY_NAME: You should enterserverhere. If you enter something else, you would also have to update the configuration files that referenceserver.keyandserver.crt.The other variables in this file that you may want to change are:
KEY_COUNTRY: For this variable, enter the two-letter abbreviation of the country of your residence.KEY_PROVINCE: This should be the name or abbreviation of the state of your residence.KEY_CITY: Here, enter the name of the city you live in.KEY_ORG: This should be the name of your organization or company.KEY_EMAIL: Enter the email address that you want to be connected to the security certificate.KEY_OU: This should be the name of the “Organizational Unit” to which you belong, typically either the name of your department or team.The rest of the variables can be safely ignored outside of specific use cases. After you’ve made your changes, the file should look like this:
Save and close the file.
To start generating the keys and certificates, move into the
easy-rsadirectory andsourcein the new variables you set in thevarsfile:Run Easy RSA’s
clean-allscript to remove any keys and certificates already in the folder and generate the certificate authority:Next, build the certificate authority with the
build-cascript. You'll be prompted to enter values for the certificate fields, but if you set the variables in thevarsfile earlier, all of your options will already be set as the defaults. You can pressENTERto accept the defaults for each one:This script generates a file called
ca.key. This is the private key used to sign your server and clients’ certificates. If it is lost, you can no longer trust any certificates from this certificate authority, and if anyone is able to access this file they can sign new certificates and access your VPN without your knowledge. For this reason, OpenVPN recommends storingca.keyin a location that can be offline as much as possible, and it should only be activated when creating new certificates.Next, create a key and certificate for the server using the
build-key-serverscript:As with building the CA, you'll see the values you’ve set as the defaults so you can hit
ENTERat these prompts. Additionally, you’ll be prompted to enter a challenge password and an optional company name. If you enter a challenge password, you will be asked for it when connecting to the VPN from your client. If you don’t want to set a challenge password, just leave this line blank and pressENTER. At the end, enterYto commit the changes.The last part of creating the server keys and certificates is generating a Diffie-Hellman key exchange file. Use the
build-dhscript to do this:This may take a few minutes to complete.
Once your server is finished generating the key exchange file, copy the server keys and certificates from the
keysdirectory into theopenvpndirectory:Each client will also need a certificate in order for the OpenVPN server to authenticate it. These keys and certificates will be created on the server and then you will have to copy them over to your clients, which we will do in a later step. It’s advised that you generate separate keys and certificates for each client you intend to connect to your VPN.
Because we'll only set up one client here, we called it
client, but you can change this to a more descriptive name if you’d like:Finally, copy the versioned OpenSSL configuration file,
openssl-1.0.0.cnf, to a versionless name,openssl.cnf. Failing to do so could result in an error where OpenSSL is unable to load the configuration because it cannot detect its version:Now that all the necessary keys and certificates have been generated for your server and client, you can move on to setting up routing between the two machines.
Step 4 — Routing
So far, you’ve installed OpenVPN on your server, configured it, and generated the keys and certificates needed for your client to access the VPN. However, you have not yet provided OpenVPN with any instructions on where to send incoming web traffic from clients. You can stipulate how the server should handle client traffic by establishing some firewall rules and routing configurations.
Assuming you followed the prerequisites at the start of this tutorial, you should already have firewalld installed and running on your server. To allow OpenVPN through the firewall, you’ll need to know what your active firewalld zone is. Find this with the following command:
OutputNext, add the
openvpnservice to the list of services allowed by firewalld within your active zone, and then make that setting permanent by running the command again but with the--permanentoption added:You can check that the service was added correctly with the following command:
OutputNext, add a masquerade to the current runtime instance, and then add it again with the
--permanentoption to add the masquerade to all future instances:You can check that the masquerade was added correctly with this command:
OutputNext, forward routing to your OpenVPN subnet. You can do this by first creating a variable (
SHARKin our example) which will represent the primary network interface used by your server, and then using that variable to permanently add the routing rule:Be sure to implement these changes to your firewall rules by reloading firewalld:
Next, enable IP forwarding. This will route all web traffic from your client to your server’s IP address, and your client’s public IP address will effectively be hidden.
Open
sysctl.conffor editing:Then add the following line at the top of the file:
Finally, restart the network service so the IP forwarding will take effect:
With the routing and firewall rules in place, we can start the OpenVPN service on the server.
Step 5 — Starting OpenVPN
OpenVPN is managed as a systemd service using
systemctl. We will configure OpenVPN to start up at boot so you can connect to your VPN at any time as long as your server is running. To do this, enable the OpenVPN server by adding it tosystemctl:Then start the OpenVPN service:
Double check that the OpenVPN service is active with the following command. You should see
active (running)in the output:We’ve now completed the server-side configuration for OpenVPN. Next, you will configure your client machine and connect to the OpenVPN server.
Step 6 — Configuring a Client
Regardless of your client machine's operating system, it will need a locally-saved copy of the CA certificate and the client key and certificate generated in Step 3, as well as the static encryption key you generated at the end of Step 2.
Locate the following files on your server. If you generated multiple client keys with unique, descriptive names, then the key and certificate names will be different. In this article we used
client.Copy these files to your client machine. You can use SFTP or your preferred method. You could even just open the files in your text editor and copy and paste the contents into new files on your client machine. Regardless of which method you use, be sure to note where you save these files.
Next, create a file called
client.ovpnon your client machine. This is a configuration file for an OpenVPN client, telling it how to connect to the server:Then add the following lines to
client.ovpn. Notice that many of these lines reflect those which we uncommented or added to theserver.conffile, or were already in it by default:When adding these lines, please note the following:
clientyour_server_ipto the IP address of your server; port1194can stay the sameThis file can now be used by any OpenVPN client to connect to your server. Below are OS-specific instructions for how to connect your client:
Windows:
On Windows, you will need the official OpenVPN Community Edition binaries which come with a GUI. Place your
.ovpnconfiguration file into the proper directory,C:\Program Files\OpenVPN\config, and click Connect in the GUI. OpenVPN GUI on Windows must be executed with administrative privileges.macOS:
On macOS, the open source application Tunnelblick provides an interface similar to the OpenVPN GUI on Windows, and comes with OpenVPN and the required TUN/TAP drivers. As with Windows, the only step required is to place your
.ovpnconfiguration file into the~/Library/Application Support/Tunnelblick/Configurationsdirectory. Alternatively, you can double-click on your.ovpnfile.Linux:
On Linux, you should install OpenVPN from your distribution's official repositories. You can then invoke OpenVPN by executing:
After you establish a successful client connection, you can verify that your traffic is being routed through the VPN by checking Google to reveal your public IP.
Conclusion
You should now have a fully operational virtual private network running on your OpenVPN server. You can browse the web and download content without worrying about malicious actors tracking your activity.
There are several steps you could take to customize your OpenVPN installation even further, such as configuring your client to connect to the VPN automatically or configuring client-specific rules and access policies. For these and other OpenVPN customizations, you should consult the official OpenVPN documentation. If you’re interested in other ways you can protect yourself and your machines on the internet, check out our article on 7 Security Measures to Protect Your Servers.